|
Click the letter button on any patient's Account details screen to send a letter to that patient. If you want to send a letter which is not associated with any particular account, click the Letter button on the Main Menu. |
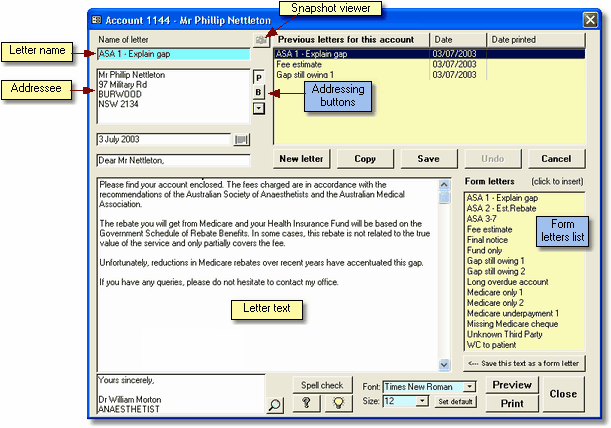
When the letters window is opened a new letter is created automatically and is addressed to the patient from whose account the letter button was pressed. You may simply type your letter text into the main body of the letter, then save, preview and print it. If you do not save it, you will be asked whether you want to save or cancel it when you close the form. This happens even if you do not enter any text since a new letter is created automatically.
Specify the name of the letter in the field on the top left of the screen. This will identify the letter in the list of letters on this patient's Documents page. A default will be inserted automatically, which will be the name of the form letter if a form letter is inserted into the body of the letter (see below). Otherwise it will be 'Custom letter'.
The patient's name and address details are entered automatically. If you have entered a third party billing address, you can toggle to and from this using the P and B buttons. Also, you can select any third party address from the lookup list which contains the same addresses as are available on the Patient Address page. If you open the letters window from the Main Menu, no addressee details will be entered and you should enter this manually.
Letters will be signed by default using the Salutation, Signature and Designation specified on the Provider page of the Options form. If you have selected an alternative provider designation for a particular account, this will replace the default designation. You may need to scroll down to see the signature name.
