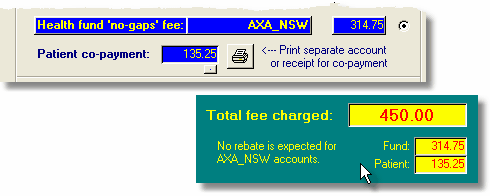
To send a separate account to a patient for whom you have already sent an account to a health fund, enter the co-payment amount into the field just below the health fund fee. Then, print the co-payment using the small print button next to the co-payment amount. The standard print button on the bottom of the Account Details screen will print the account for the health fund, while the Co-payment print button will print the co-payment account for the patient. The co-payment account is the same as the standard account, except that a customised message is shown in place of the items list. The wording on the co-payment account can be modified on the Co-payments page of the Options form.

The co-payment amount is added to the basic fee for the account, and together these form the total fee. In the Total fee charged field, the total amount due for the entire account is shown, with the breakdown between fund and co-payment shown below. Summary features of the system use this total fee in calculations.
The co-payment is added after any discounts or GST are calculated. Consequently, discounts and GST can be applied only to the fund component, not to the co-payment.
Using Co-payments with My Own Fee
If you wish to determine your total fee using a specific RVG unit value, you would normally use the My Own Fee option described below. If you wish to break this amount down to a fund fee and a patient co-payment, proceed as follows:
| 1. | Create My Own Fee and select a health fund fee on the Items page. |
| 2. | Select the health fund fee on the Fee page. |
| 3. | Click the small button directly below the co-payment field on the Fee page, and the difference between My Own Fee and the fund fee will be inserted as the co-payment amount. |